Python setup and installation
There are many ways to use and install Python. Here we list some recommended ways to get started in increasing order of complexity.
Google Colab (Easiest):
Want to use Python without installing anything? Enter Google Colab, a free environment for running Jupyter notebooks, allowing you to create text and code cells side by side with a Google account being all you need to start.
Colab is a popular choice for quick and dirty data science projects. It has many popular libraries pre-installed, and you have the ability to install any others you need as well. You even have access to Google’s GPUs for free, which is great for many deep learning pipelines. Finally, it is incredibly easy to share your notebooks, with the same sharing tools as other Google Drive products.
Cons
There are some downsides to Colab, however. It is not incredibly straightforward to connect to version control. Uploading data sets can also be a drag, as you have to re-upload your files every time you refresh the page, though you can connect your Google Drive to Colab to in theory get around this.
Installation
Again, there is no installation process for Colab. Simply go to research.google.com/colaboratory and connect your Google Account to get started.
Anaconda (Most tools):
Anaconda is an incredibly popular distribution of Python. It comes pre-loaded with a plethora of Python libraries, as well as environments in which to run your scripts and Jupyter notebooks, like JupyterLab and Spyder.
Anaconda also comes ready with the conda environment managing
system. conda allows you to separately install and download versions
of libraries and Python itself for individual projects. This can be
incredibly useful if you need to use Python 3.7 to use tensorflow
for a project, which depends on 3.7, but would like to use 3.9 or other
versions for other projects. conda makes sure your libraries always
use the correct versions and dependencies for that environment.
Cons
Anaconda’s main downside is its large installation size, due to the numerous packages and programs that come with it. Make sure you have at least 3 GB of disk space free before you install.
With everything that is installed, it can also be a bit confusing which editor, IDE, or environment to use for the job. Spyder or Jupyter notebook are safe bets, and you can also use other environments like VS Code or PyCharm, as well.
Installation
Download the installer for the free individual edition of Anaconda - Python 3.9 edition. You will find installers for Windows, Mac, and Linux here: https://www.anaconda.com/distribution.
Proceed through a standard installation, which will require several clicks.
Once your installation is completed, open Anaconda Navigator from your applications. Here you will see lots of useful applications!
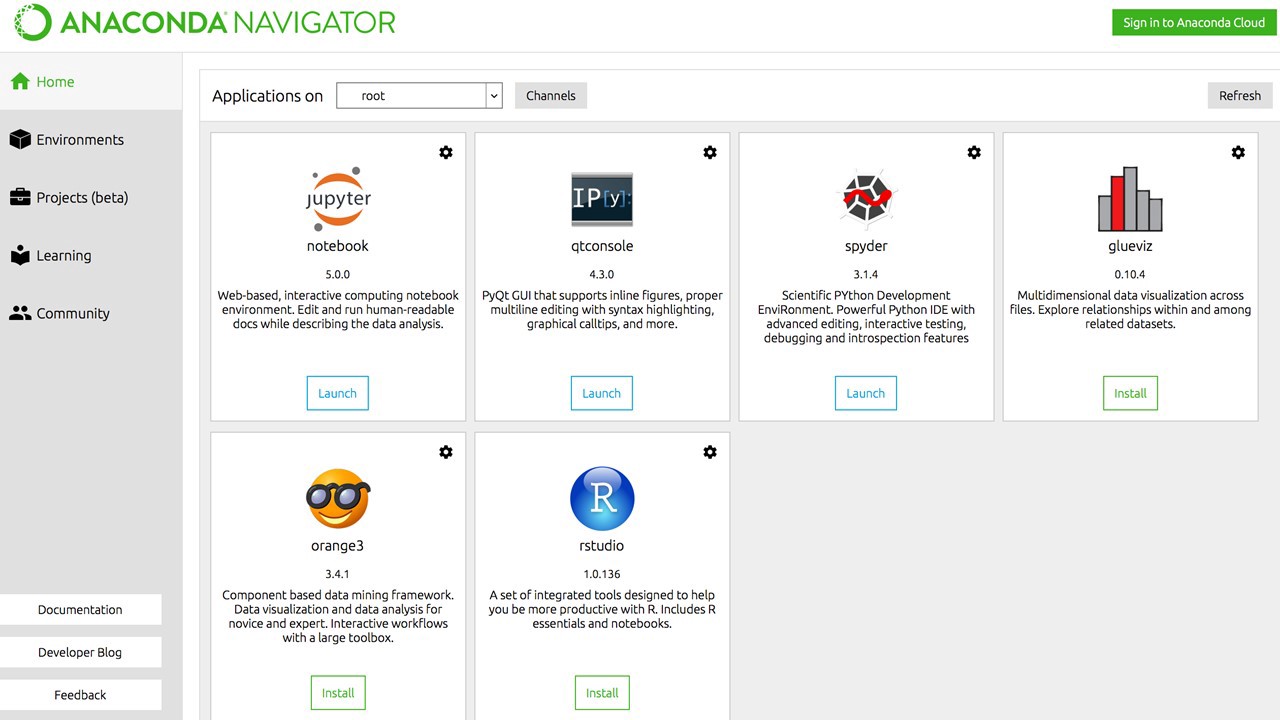
In Anaconda Navigator on the Home tab, you will see a tile that says Jupyter Notebook. Click Launch (or Install and then Launch) to open Jupyter Notebook in a web browser.
Jupyter Notebook opens in a web browser but is running locally on your computer. On the main tab Files you will see a location in your file system. This startup folder is called the root directory of the app. Make sure you have a folder you can navigate to where you can put any files and datasets you’ll be using.
Miniconda (Most streamlined)
Want access to Python conda without having to download 3 GB of programs
and files?
Miniconda is here
for you. You get all of the environment control features of conda
without any of the fluff you don’t specifically want.
Cons
Because using conda, and therefore Miniconda, requires you to use
terminal and the command line. That being said, the commands to run
conda are relatively straightforward (e.g. conda activate my-env
or conda install numpy).
Installation
Follow the instructions for your operating system from the conda docs.
You will also need a text editor or IDE. We recommend Spyder, VS Code, or PyCharm.